Hello Crafters.....
This weeks' change in weather with the sun has inspired today's make... and to use a colour which I usually avoid. Orange is out of my normal comfort zone, so I challenged myself to give it a go and mix it with some other colours - hence the title :-)
So let's get started and show you how I made this card.
Step 1
I started with an 8x8" card base and then used my Double Stitched Square Dies to create my mats in orange card and Gold Mirror card. We will be transforming our orange mat shortly.....

Next I cut my circle mats using my circle dies. I used gold Mirri again, but also a nice yellow card.
These again will be transformed.

Step 2
✅ As most of you know, one of my favourite craft tools is my Make Art Stay-tion Board - I highly recommend it for stamping and stencilling, super handy as it's magnetic :-)
I popped my orange mat down and then laid Jamie Rodgers Crafts new Floral Burst Stencil on top.
As the stencil is an amazing super sized 8x8" I wanted to secure it fully, so I added a little low tack tape as well as my magnets!!
Taking a palette knife, I spread Cosmic Shimmer Sparkle Glaze all over my stencil evenly.

Once the whole areas was covered, I gently removed the tape and magnets and lifted the stencil.
✅ TOP TIP - Remember to keep your stencils and products in the best condition, wash them in warm soapy water straight after use

Well, now I can see why I called this card Summer Sorbert! lol. Looked so delicious lol.
I won't show you as I want you to try it out yourself and see your own results!
Step 3
After setting my background aside to dry, I grabbed my circles and set to decorate them.
Here again I've used two of Jamie's stencils :-
I took a blending brush along with Distress Oxide Inks - Kitsch Flamingo and Worn Lipstick.
Again I used my Make Art board to help.
By using two tones of pink, I could give a lovely shading to my design.

I repeated this process for one of the other circles, however this time I used the above stencil with Distress Oxides - Shabby Shutters and Bundle Sage.
📸 NOTE - The colour looks a little blue, but this is due to green on yellow card.
Taking the last circle, I cut out the centre piece of Jamie Rodgers Crafts Happy Birthday Circle Die and then cut it again in orange card.
Gently cut the sentiment away on the orange card. (See photo below)📸

Next glue the orange to the yellow.
It's quite fiddly, but don't worry if it's not perfect, as having the yellow peep through still looks good.
Glue the three layers to the gold circles ready for later.
Step 4
For my last die cut pieces.... I cut one pass in pink card using Jamie's Straight Line Die.
Next I cut a light pink butterfly from Jamie's Elegant Butterflies and then cut another in darker pink, but used the negatives to draw a shape, that can then be used behind my die cut.

Glue these together and set aside.

Step 5
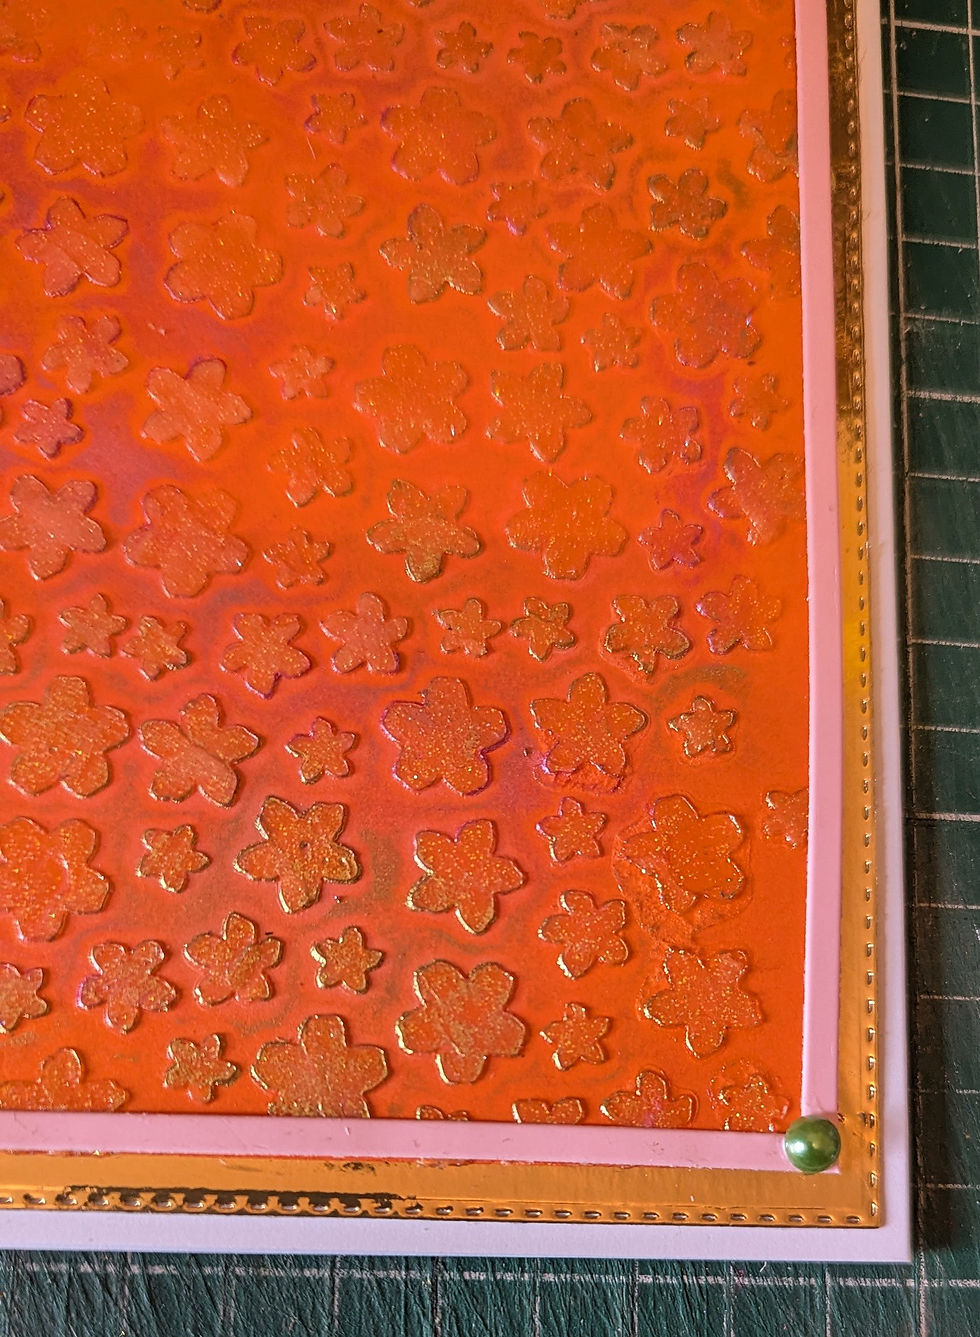
I glued my gold layer to my card base and then I decided to add a bit of grunge to my orange layer before gluing to my card.
I added some Metallic Gilding Polish here with Cosmic Shimmer Gold Treasure and Indian Pink.
When you want to add a little glow to your background, these Polishes are perfect :-)
I then adhered this to my gold layer.

Now I added a frame to the orange layer and used the pink straight line I had cut earlier.
Once completed, I used some green pearls to cover the corner joins. See photo below 📸

Last Step - 6
Now to decide the placement of the circles.... and the layout is entirely up to you.
My finishing touch was the pink butterfly... and that is my card complete!!!

I hope you've enjoyed my blog, and as always, thank you for joining me!
I hope this has given you the courage to try some of those bold colours as well as giving the techniques a go to see what results you can create...
Your craft rooms await so I can't wait to see you fabulous creations - share with us on our Facebook Group - Create With Craftmania And Jamie Rodgers.
See you all next week!
Take care,
Ian x
Craftmania Shopping List......
OTHER DIES
Also Available
CARD
INKS
COSMIC SHIMMER PRODUCTS
ADHESIVES & GLUE
CRAFTING TOOLS
Also Available


Comentários